A few months ago at John Dilworth Violins, me and John sat in the workshop and we’re chatting about the viol family and some of their different methods of construction compared to the violin family, in particular the open scroll design.
John advised me to get in contact with Strad Magazine and ask if I could write about this subject. The Strad liked the idea and asked me if I could write a ‘Trade Secrets’ about a Viola da Gamba scroll.
You can find the article below which was published in May 2014.
Titel: ‘Trade Secrets’: Making a viola da gamba scroll
Making a Viola da Gamba Scroll
The method of constructing a viola da gamba differs in many ways from that of a violin: it is made without a mould and has linen linings, a veneered fingerboard, and often a five piece bent front, to name just a few. The open scroll is another distinctive feature.
Making a gamba scroll also requires a slightly different approach. Because of the open design, the scroll does not have fluting or an undercut, so the curves and volutes are a little more subtle. The recess and scroll have to work together and balance each other, as the process essentially means that two outlines are created. To some extent, the space is as important as the scroll itself – the eye is drawn to the outline but possibly even more to the recess.
For the method described in this article, I am making a copy of a treble viol scroll by the 17th-century English maker Henry Jaye. I feel that the original gamba scrolls have a light, elegant look about them. In a way, I find the open design a very modern look – I’m still astonished that it is more than 400 years old.
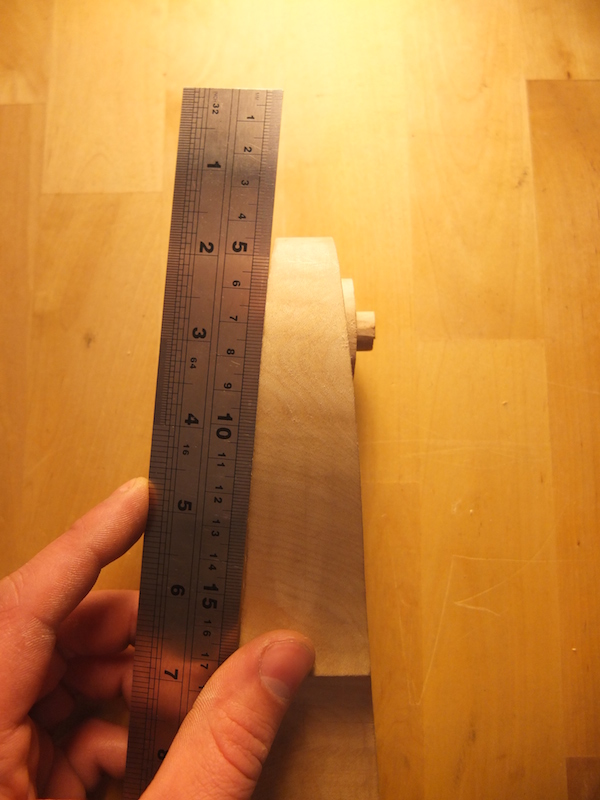
1. A gamba neck can be made from several kinds of wood, such as maple, pear and service (the scroll shown in the photographs is maple). I choose a neck-block with a light flame because I intend to do some relief carving around the pegbox at the end. I plane all the surfaces of the neck-block until they are flat, perpendicular and down to 50 mm at the widest point, at the bottom of the neck. Then I draw the outline on to both sides using a pencil.

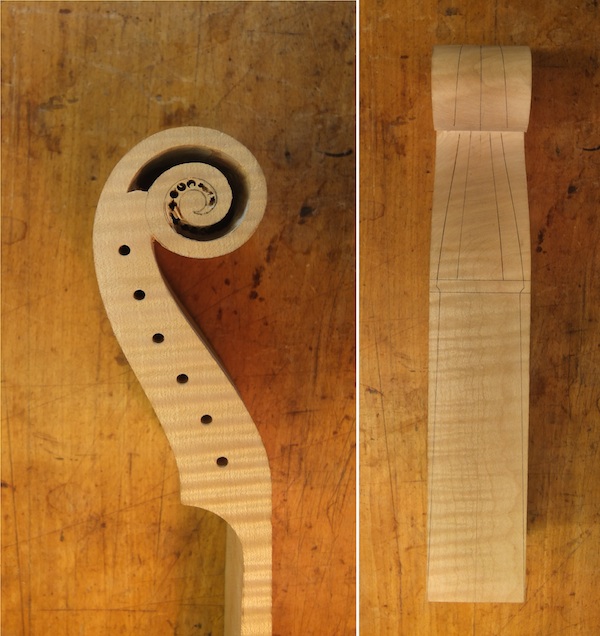
2. I cut out the outline with a bandsaw and finish the outer surface with a fine rasp, file and scraper. Some gamba scrolls don’t have fluting or relief carving around the pegbox, so it is easiest to finish the outside completely at this stage. I find it helpfull to drill the pegholes at this point, as well as a hole in the volute where I can put the coping saw in the next stage. Because a gamba has a two more strings, I keep an eye on the peg spacing to leave enough string clearance in the pegbox.
I scribe the centre line on with a marking gauge, but use a pencil to draw the outline on the outside of the pegbox and scroll, so that it doesn’t leave a mark on the finished surface.

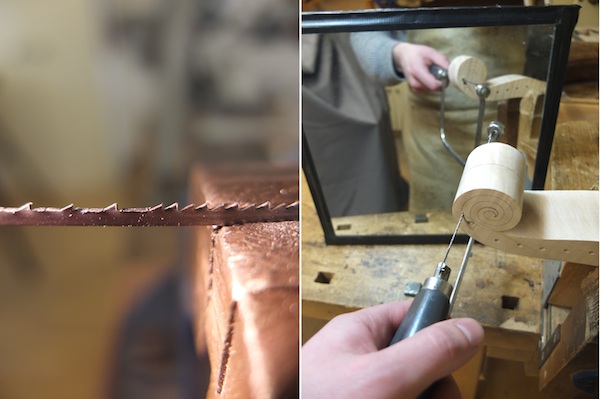
3. Before carving the scroll, I first saw away most of the material for the recess. Using a coping saw allows me to change the angle of the blade, making it easier the cut around the scroll. I adapt the saw blade by taking out every 2nd and 3rd tooth with a needle file. This allows the teeth to dig in more, and gives less friction. Putting the blade in upside down so it cuts on the upstroke, gives you more control whilst sawing.
Then I clamp the neck in a vice and place a mirror behind it so I can keep an eye on the line on the other side as I saw.
4. I don’t cut all the way to the end – instead I finish with a series of small holes around the eye to remove as much material as possible. This will make it easier for me to carve right up the eye at the end.
Then I clean up most of the inside by using an in-cannel gouge and a small chisel, placing the scroll on its side on the bench and working my way in from both sides. I finalise the outline of the recess as I carve the scroll. Then I draw out the neck, pegbox, nut and the first turn of the volute. The pegbox walls on a Henry Jaye are very distinctive, as they taper to two-thirds of its thickness at the top. The pegbox itself tapers towards the back as well.
5. Having cut away most of the material around the pegbox with the bandsaw, I finish the sides with a small block plane. Where the pegbox walls of a violin can run perpendicular, a gamba pegbox generally runs in a straight, fluid line into the scroll.
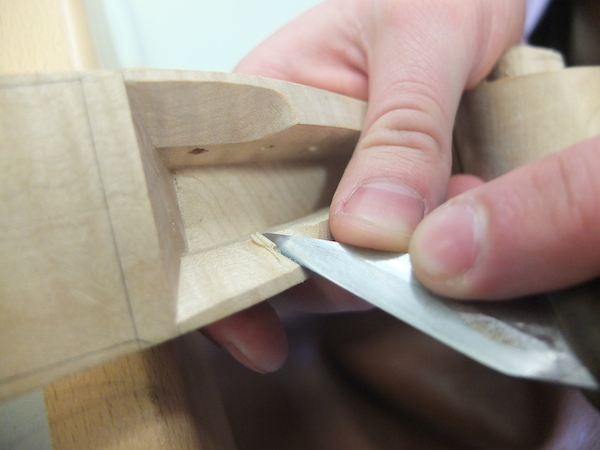
6. When the outside of the pegbox is finished, I carve both sides of the scroll, step by step, at the same time. This gives me more control on the scroll’s continuity.
As I go around the scroll, I clean up the inside and correct the thickness of the walls of the scroll using a knife, small chisel and my in-cannel gouge. I used to use the coping saw to cut right up to the eye, but I found that this set of small tools gave more control over this delicate part of the process. On the original scrolls you can still also see some of the gouge marks and chisel cuts in the recess. I continue to keep an eye on the balance between the recess and the outline, as well as creating a natural flowing line on the inside that runs parallel with the outside of the scroll.

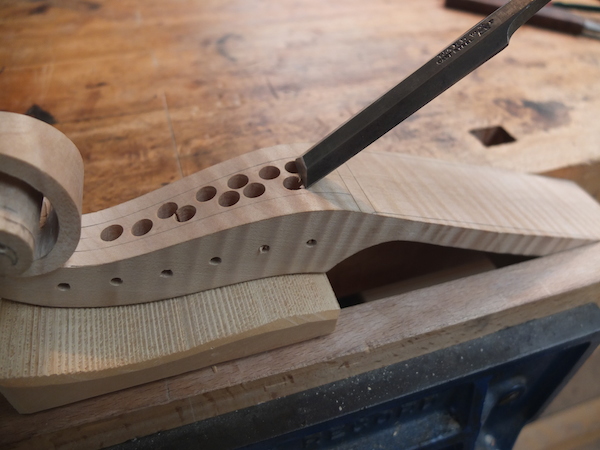
7. After drilling away most of the inside of the pegbox with the pilardrill, I clamp the neck into a vice. With a support placed behind the scroll, I chisel out the last waste material. The pre-drilled pegholes give an idea of how much more I still have to cut away. Then I damp the end-grain and use a wide, flat chisel to get a clean-cut finish.
8. The slants in the pegbox walls are among the gamba scroll’s more distinctive features. I use a knife to cut these chamfers, first making a cut along the nut to prevent it from splitting.
These chamfers give the outer two strings the clearance to enter the pegbox. The slant usually run up to the second peg and stop just above the pegholes. This way is doesn’t change the thickness around the pegs, so there is still enough for it to ‘grip’.